12 Rules to Nail Homemade Fermented Foods Every Time
Fermenting at home isn’t rocket science, but there’s a certain magic in watching those bubbles dance up through your kimchi or hearing that satisfying “pop” from your sourdough. I’ve ruined enough batches of sauerkraut to write a tragedy, but those failures taught me more than my successes ever did. The good news? You don’t have to learn the hard way.
Your microbe friends need specific conditions to work their transformative powers on your food. Think of yourself as the party planner for billions of beneficial bacteria. You provide the right venue (clean jars), guest list (salt ratios), and atmosphere (temperature) – they’ll handle turning your humble cabbage into probiotic gold.
Whether you’re a first-timer or a fermentation fanatic looking to troubleshoot, these 12 rules will save your pickles from mold invasions and your kombucha from turning to vinegar. From managing pesky kahm yeast to creating the perfect anaerobic environment, I’ve got your back. Let’s turn your kitchen into a fermentation station where success is the only option.
Kahm Yeast Prevention
Picture this: you’re peering into your prized jar of sauerkraut, expecting those beautiful bubbles of fermentation magic, when suddenly you spot it—a thin, white film floating on top like an unwelcome party crasher. Meet kahm yeast, the mildly annoying but mostly harmless guest that loves to show up uninvited to your fermentation party. This wild yeast creates that telltale white scum because it thrives in low-salt, oxygen-rich environments, basically the opposite of what your vegetables want. While it won’t kill you (kahm yeast is generally safe), it can make your ferments taste funky in all the wrong ways—think musty basement rather than tangy perfection.
The good news? You can totally outsmart this microscopic troublemaker with a few simple tricks. Keep your ferments properly submerged under their brine like vegetables taking a spa day—oxygen is kahm yeast’s best friend, so don’t give it any breathing room. Bump up your salt concentration slightly if you keep seeing this uninvited guest; kahm yeast hates a proper salty environment. Store your ferments in cooler spots (around 65-72°F works beautifully) because this yeast goes absolutely wild in warm temperatures. And here’s a pro tip that’ll make you feel like a fermentation wizard: if you do spot kahm yeast, just skim it off with a clean spoon and carry on—your vegetables underneath are probably still perfectly fine and ready to deliver that probiotic punch you’re after!
Time Management

Fermentation runs on its own sweet schedule, and frankly, it doesn’t care about your dinner party timeline or your impatient hunger pangs. You can’t rush a good kimchi any more than you can convince a teenager to clean their room – it happens when it happens. The secret lies in planning ahead and accepting that your mason jars will become temporary residents on your counter for days, weeks, or even months. Ancient Koreans didn’t invent kimchi because they needed something quick for Tuesday’s lunch; they created it knowing winter was coming and good things take time. Start your sauerkraut on Sunday if you want it ready for next weekend’s bratwurst fest, not Thursday afternoon.
Here’s where fermentation becomes beautifully forgiving: unlike that soufflé that collapsed because you opened the oven door too early, fermented foods actually improve with patience. Your vegetables are busy throwing their own microscopic party, converting sugars into tangy goodness while you sleep, work, or binge-watch cooking shows. Keep a fermentation calendar – trust me, you’ll forget when you started that batch of pickles faster than you can say “lactobacillus.” Mark start dates, expected finish times, and tasting schedules. Some ferments like water kefir dance their way to perfection in 24-48 hours, while others like aged miso prefer a leisurely six-month vacation in your pantry. Think of yourself as a fermentation concierge, checking in on your bubbly guests but never rushing them out the door.
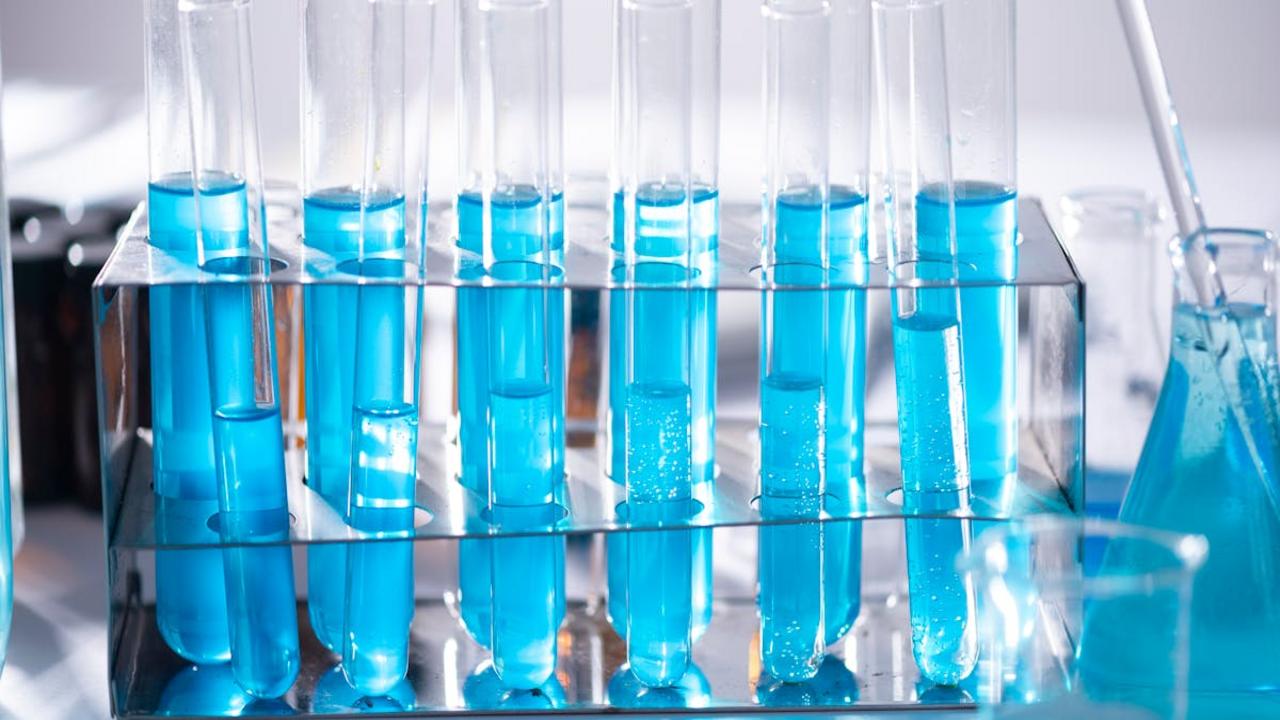
pH Monitoring
You know that friend who obsesses over every Instagram filter until their sunset looks perfect? Well, meet your fermentation equivalent: pH monitoring. This little number between 0 and 14 tells you exactly what’s happening in your jar of bubbling magic. Most successful ferments hover around pH 3.5 to 4.5 – acidic enough to keep the bad bacteria running scared while your good lacto-bacteria friends throw their party. I learned this the hard way after my first batch of sauerkraut turned into what I can only describe as “regrettable mush” because I trusted my nose instead of science.
Grab yourself some pH strips from the pharmacy (yes, the same ones pool owners use) and dip them into your ferment every few days. Watch those colors change like a mood ring from the ’90s! If your pH drops below 3.5, your ferment has gone full-tilt sour and might taste like you’re drinking pickle juice straight from the jar. Above 4.5? You’re playing with fire, my friend, because spoilage bacteria love those higher numbers. Fun fact: the ancient Romans accidentally discovered fermentation pH balance when they noticed their wine stayed good longer in certain clay pots – turns out those pots were naturally acidic!
Cross Contamination Prevention
Picture this: you’ve spent weeks lovingly tending to your perfect batch of kimchi, only to discover a rogue blue fuzz has invaded your fermentation paradise. That, my friend, is cross contamination doing its dirty work, and it’s the villain of every fermenter’s nightmare. Your kitchen becomes a battlefield where good bacteria fight evil mold, and you need to pick the right side from day one. The secret weapon? Clean everything like your grandmother’s coming for Sunday dinner and she’s bringing white gloves for inspection.
Start with separate cutting boards for different projects – your sauerkraut deserves its own real estate, not leftovers from last night’s raw chicken adventure. Wash your hands obsessively (think surgeon-level dedication), sanitize jars with boiling water, and keep fermented foods away from fresh produce that might harbor unwanted microbes. Store your fermenting jars in their own designated space, because even friendly ferments can cross-pollinate in ways that create funky flavors you never signed up for. One contaminated batch can turn your kitchen counter into a science experiment gone wrong, complete with mysterious smells that make your neighbors question your life choices.
Weight Distribution

You know that friend who always stands with perfect posture while you’re slouching like a question mark? Well, your fermented vegetables need that same kind of balance, except we’re talking about weight distribution rather than yoga class corrections. When you’re packing your sauerkraut or kimchi into jars, you can’t just throw everything in willy-nilly and hope for the best – that’s a recipe for mushy disappointment and possibly some funky flavors that nobody ordered. The secret lies in creating even layers throughout your container, ensuring each vegetable gets its fair share of brine contact and pressure. Think of it like building the world’s most delicious sandwich: you wouldn’t pile all the turkey on one side and leave the other half naked, right?
Here’s where things get wonderfully nerdy: proper weight distribution creates consistent anaerobic conditions throughout your fermentation vessel, which means happy bacteria doing their job uniformly rather than throwing a chaotic microscopic rave in one corner while the other side sits there like wallflowers. Pack your vegetables firmly but not aggressively – imagine you’re tucking them into bed, not performing CPR. Leave about an inch of headspace at the top because fermentation creates gases, and nobody wants their kitchen counter decorated with exploded cabbage confetti. I learned this lesson the hard way when my overstuffed pickle jar decided to redecorate my ceiling at 2 AM, creating what I now fondly call “The Great Dill Disaster of 2019.”
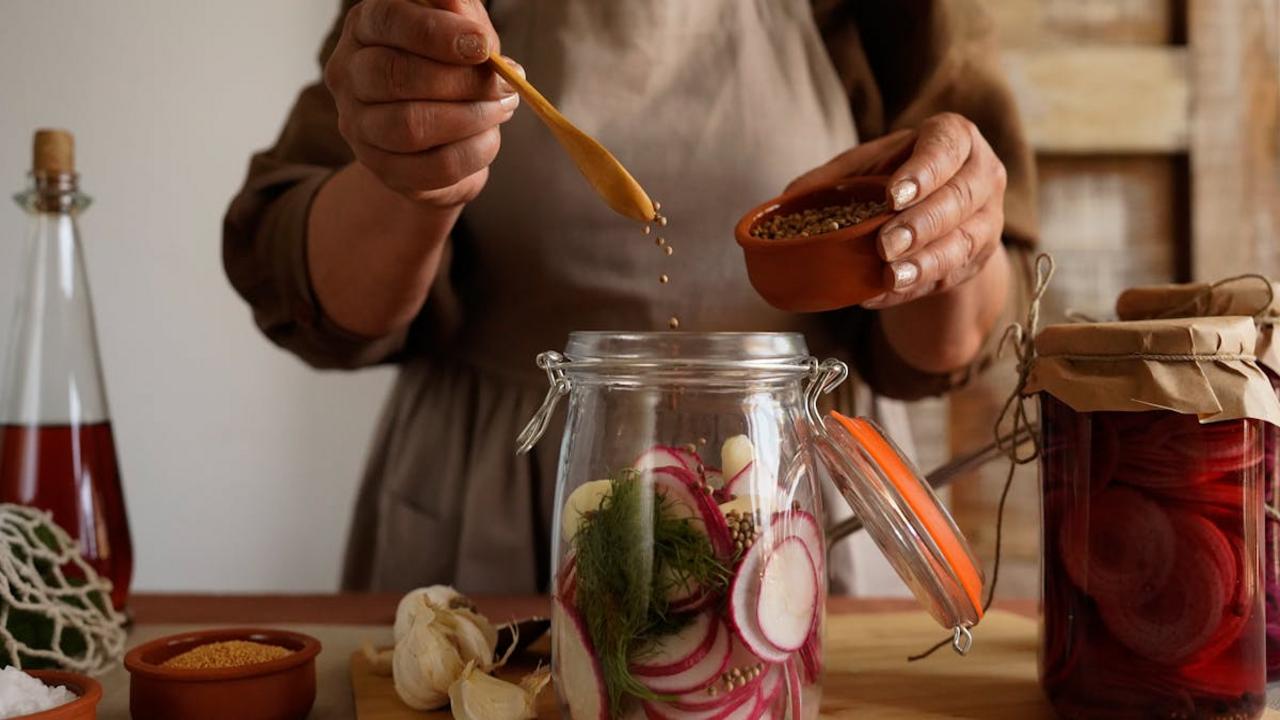
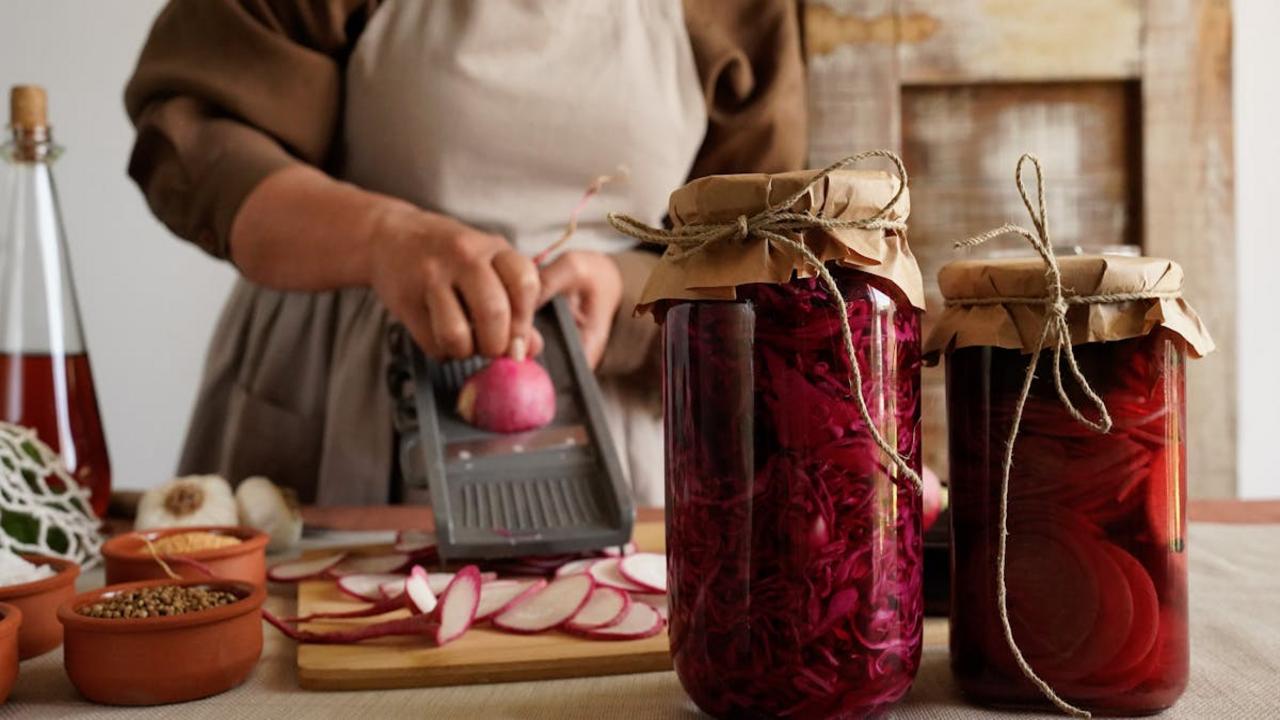
Brine Coverage
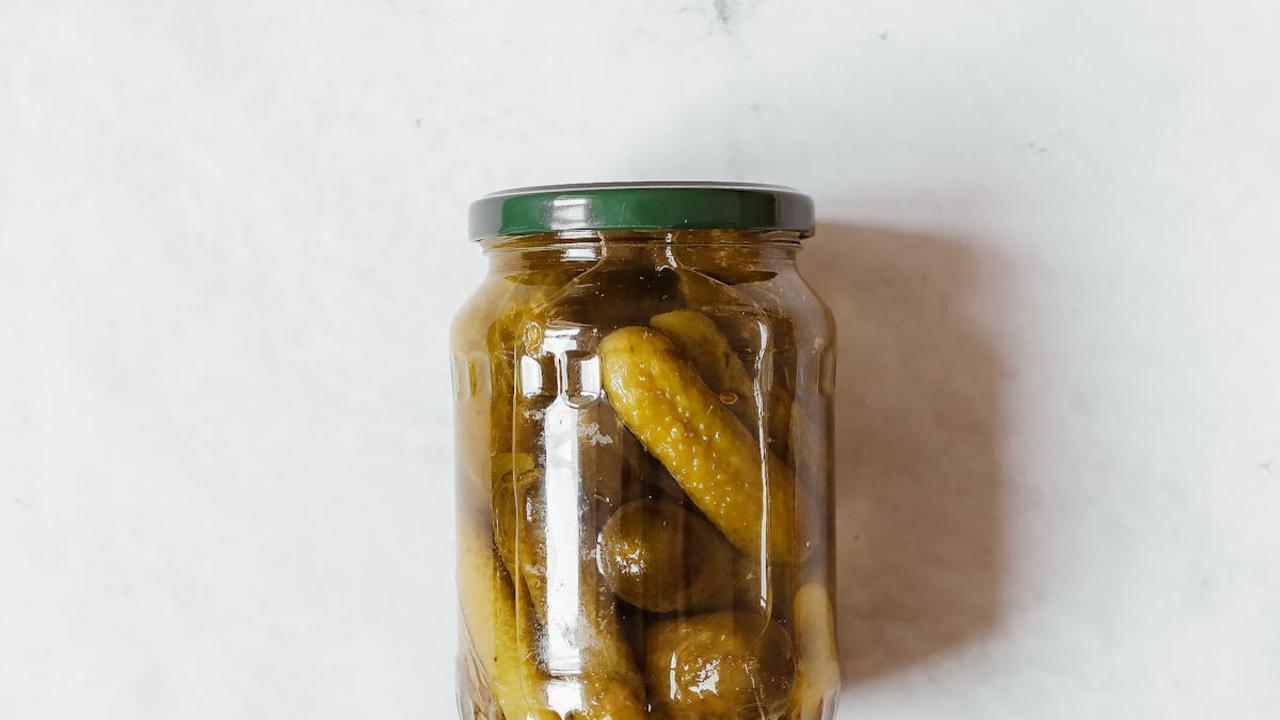
Think of brine coverage as your fermentation safety blanket – except this blanket happens to be made of salty, bubbly liquid that keeps the bad bacteria at bay while your vegetables transform into tangy treasures. Your veggies need to stay completely submerged under their briny bath, or they’ll develop fuzzy white mold faster than you can say “oops.” I learned this lesson the hard way when my first batch of sauerkraut sprouted what looked like a miniature cotton candy factory on top. Not the sweet kind of cotton candy, mind you – the kind that makes you question your life choices.
Keep those rebellious cucumber tops and cabbage leaves pushed down with a fermentation weight, clean stone, or even a ziplock bag filled with brine. The magic number is keeping everything at least one inch below the surface – any higher and you’re basically inviting trouble to your fermentation party. Pro tip: if your brine level drops during fermentation (and it will, because science), just mix up a quick 2% salt solution and top it off. Your vegetables will thank you by staying crisp, flavorful, and completely mold-free throughout their bubbly transformation.
Vegetable Freshness
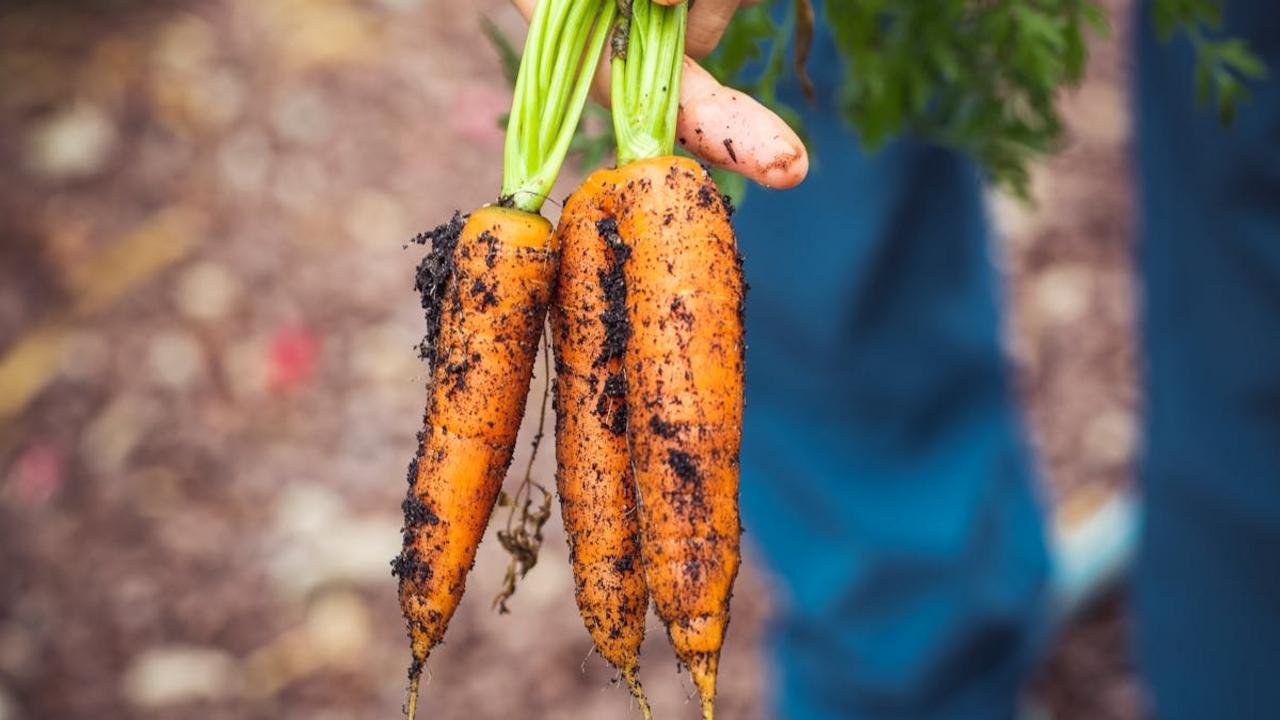
Here’s the deal: your vegetables need to be fresher than your morning breath if you want fermentation magic to happen. I learned this the hard way when I tried fermenting some sad, wilted carrots that had been lounging in my crisper drawer for who-knows-how-long. The result? A jar of mushy disappointment that even my compost bin rejected. Fresh vegetables carry the strongest populations of beneficial bacteria on their skins – those microscopic workhorses that transform ordinary produce into tangy treasures. Think of them as tiny construction workers ready to build flavor castles, but only if you give them quality materials to work with.
You want vegetables so crisp they practically snap at attention when you pick them up. The ideal candidates have bright colors, firm textures, and that satisfying crunch that makes you feel like you’re biting into pure garden sunshine. Skip anything that’s starting its own science experiment with fuzzy spots or has gone limp like a disappointed soufflé. Pro tip: shop at farmers markets or pick your own if possible – vegetables that traveled three miles beat those that hitchhiked across three states any day. Your fermentation project deserves ingredients that still remember what dirt tastes like, not ones that have been sitting under fluorescent lights longer than a night shift worker.
Proper Water Quality

Your tap water might taste fine for your morning coffee, but your fermenting friends are pickier than a toddler at dinnertime! Chlorine and fluoride – those chemical additives that keep our municipal water “safe” – act like party crashers in the fermentation world, literally killing off the beneficial bacteria you’re trying to cultivate. Think of it this way: you wouldn’t spray disinfectant on your sourdough starter, so why give it chlorinated water? The solution is surprisingly simple: use filtered water, or better yet, let tap water sit uncovered for 24 hours so the chlorine evaporates naturally (though fluoride will stick around like that friend who doesn’t know when to leave).
Here’s a fun fact that’ll make you the hit of your next dinner party: different minerals in water can actually change the flavor profile of your ferments! Hard water with lots of calcium and magnesium can make your vegetables crispier (hooray!), while soft water might leave them a bit mushy (boo!). I learned this the hard way when I moved apartments and suddenly my previously perfect sauerkraut turned into sad, soggy cabbage soup. Now I test my water like a scientist before starting any fermentation project – pH strips and mineral test kits have become my new best friends, right next to my trusty fermentation weights and that slightly suspicious jar of kimchi that’s been bubbling away in my fridge corner.
Clean Equipment Sterilization
You know that friend who swears their homemade kimchi tastes like feet? Nine times out of ten, they skipped the sterilization step and invited every unwanted microbe to the party. Think of sterilizing your equipment as bouncer duty for your fermentation club – you want the good bacteria VIPs getting past the velvet rope, not the sketchy characters lurking in dark corners. I learned this lesson the hard way when my first batch of sauerkraut turned into something that could strip paint. The culprit? A “clean” jar that harbored more bacteria than a preschooler’s hands after recess.
Here’s your sterilization game plan: boil your jars, lids, and utensils for at least ten minutes, or give them a hot rinse with boiling water if you’re feeling lazy (we’ve all been there). Some fermentation rebels swear by a diluted bleach solution – one tablespoon per gallon of water – but rinse everything thoroughly afterward unless you want your pickles tasting like a swimming pool. Pro tip: keep a designated “fermentation towel” that gets the same sterilization treatment, because drying your pristine equipment with that questionable kitchen towel defeats the whole purpose. Your future self will thank you when your fermented vegetables actually taste like food instead of science experiments gone wrong.
Anaerobic Environment

Your fermented foods need to live their best bacterial life in a world without oxygen, and trust me, these microbes are pickier than your college roommate about their living conditions. Creating an anaerobic environment means keeping air away from your fermenting goodies, because oxygen is basically kryptonite to the beneficial bacteria doing all the heavy lifting. You’ll want to weigh down your vegetables below the brine level – think of it like tucking them into a salty blanket where they can work their magic undisturbed. Glass weights, clean stones, or even a smaller jar filled with water can serve as your vegetable babysitter, making sure nobody floats to the surface for an unwanted oxygen bath.
The beauty of anaerobic fermentation lies in how these bacteria actually prefer their airless apartment – they’re basically the introverts of the microbial world, thriving when left alone in their oxygen-free bubble. Without air exposure, the good guys like lactobacilli can multiply and produce those tangy, complex flavors that make your homemade sauerkraut sing opera in your mouth. If oxygen sneaks in, you might end up with fuzzy white or green visitors (aka mold) crashing your fermentation party, and nobody wants uninvited guests spoiling the fun. Keep that brine level high, your weights secure, and watch your vegetables transform into probiotic powerhouses that would make any health food store weep with envy.
Salt Ratios
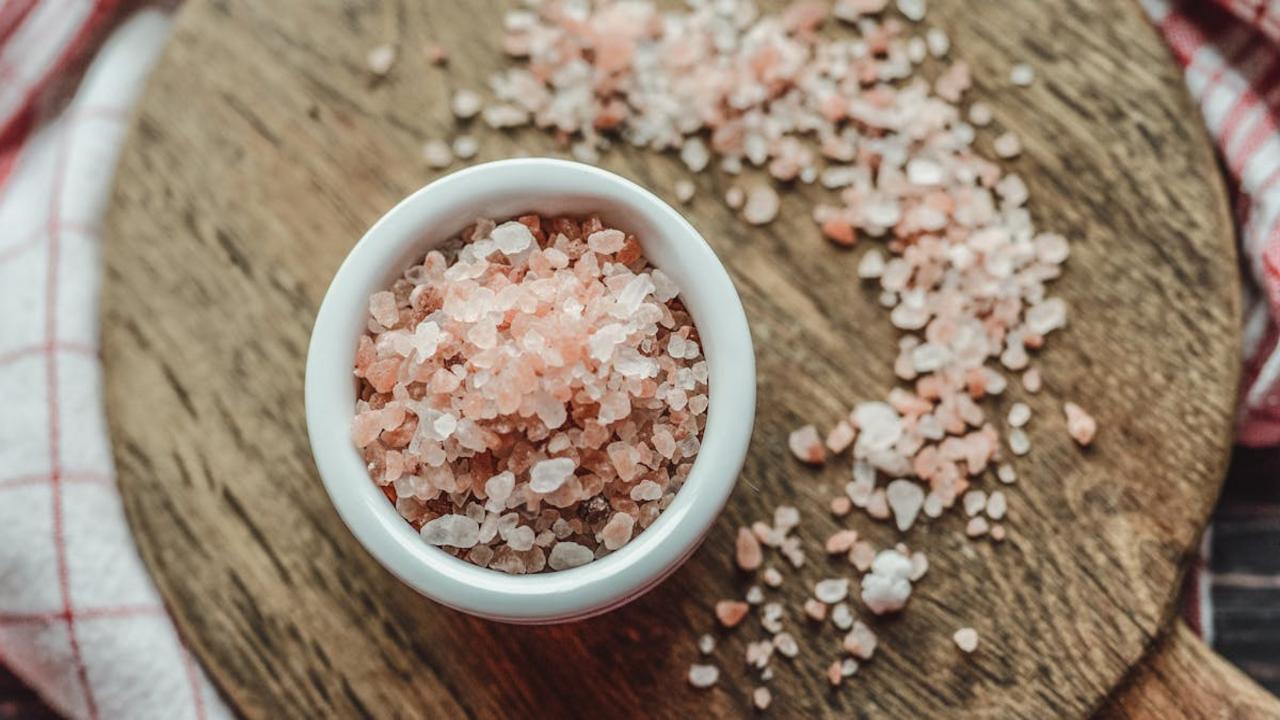
You know that moment when you’re standing in your kitchen, salt shaker in hand, wondering if you’re about to create fermented gold or accidentally turn your cabbage into a science experiment gone wrong? Welcome to the wild world of salt ratios, where precision meets chaos and your grandmother’s “pinch of this, dash of that” philosophy suddenly seems terrifyingly vague. Here’s the truth: salt isn’t just seasoning in fermentation—it’s your bouncer, your bodyguard, and your best friend all rolled into one crystalline package. Too little salt, and you’ve basically thrown open the doors to every bad bacteria in the neighborhood. Too much, and you’ve created a desert where even the good microbes pack up and leave.
The magic number for most vegetable ferments? Two percent salt by weight of your vegetables. Yes, I said weight, not volume—because measuring salt by the handful is like trying to bake a cake by vibes alone. Get yourself a kitchen scale and thank me later when your sauerkraut doesn’t taste like the Dead Sea. For those kimchi adventures, you can push it to three percent if you’re feeling spicy (literally). And here’s a fun fact that’ll make you the hit of dinner parties: salt concentration affects not just safety but texture too. Higher salt means crunchier vegetables, while lower salt gives you that perfect tender-crisp bite. Your ferments will go from sad, mushy disappointment to Instagram-worthy crunch fest faster than you can say “lactobacillus.”
Temperature Control
Listen, your kitchen thermometer isn’t just gathering dust next to that bread maker you never use—it’s about to become your fermentation fairy godmother! Temperature control separates the pros from the “why does my sauerkraut smell like gym socks?” crowd. Most beneficial bacteria throw their best parties between 65-75°F, while their evil cousins (the ones that make you question your life choices) prefer temperatures above 80°F. Think of it like Goldilocks, but instead of porridge, you’re babysitting billions of microscopic organisms who are surprisingly picky about their living conditions.
Here’s where things get interesting: your house probably fluctuates more than a teenager’s mood swings throughout the day. That sunny windowsill? It’s a bacterial sauna by afternoon. Your basement? Probably colder than your ex’s heart. Professional fermenters use heating mats, but you can get creative with heating pads on low, the top of your refrigerator, or even inside your oven with just the light on (trust me, I’ve turned mine into a kimchi spa). Just remember to check temperatures twice daily—bacteria don’t text you when they’re uncomfortable, but they’ll definitely make their displeasure known through funky flavors and questionable aromas.